Android Chrome Google DNS Setting Guide
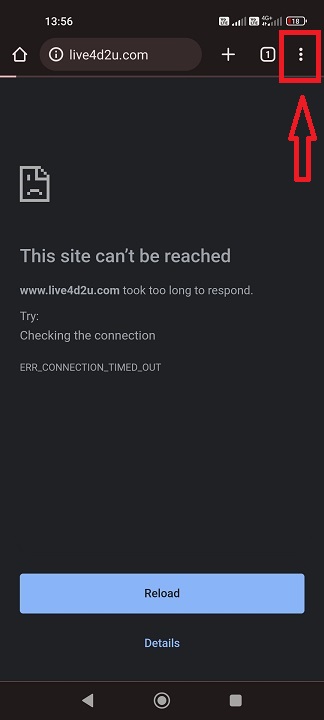
Step 1
Open your chrome browser, then select the menu at the top right
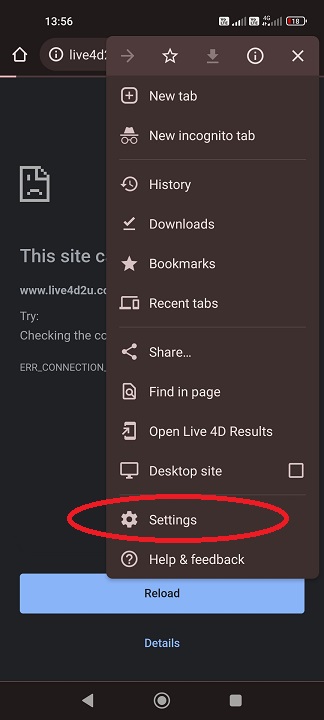
Step 2
Select "Settings"
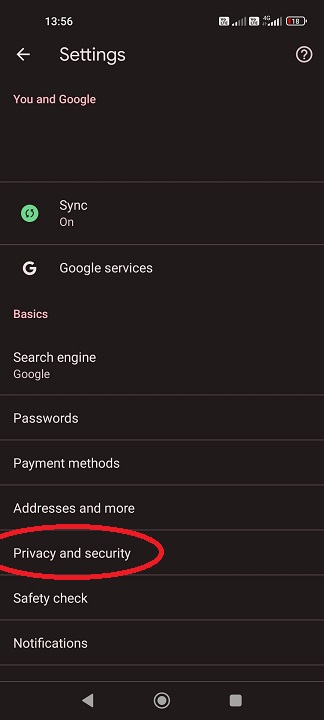
Step 3
Select "Privacy and security"
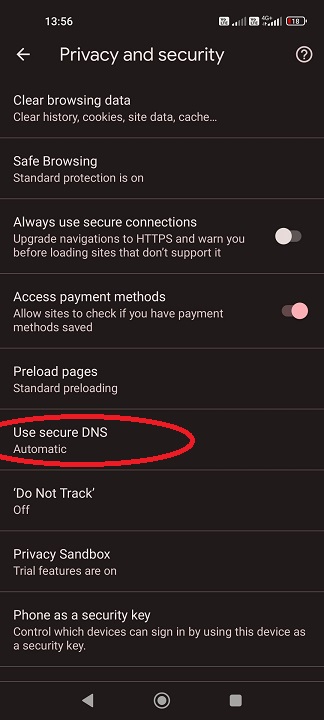
Step 4
Select "Use secure DNS"
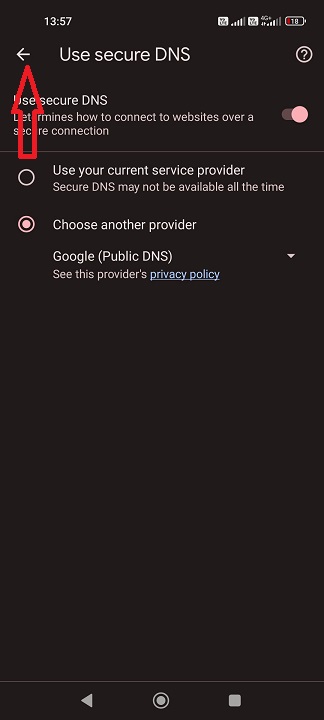
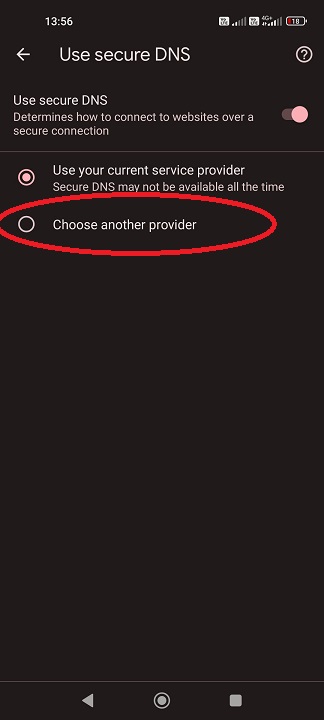
Step 5
Select "Choose another provider"
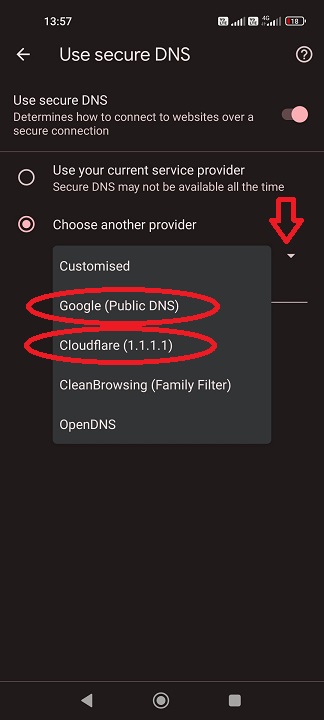
Step 6
Pull down the dropdown and select "Google (Public DNS)" or "Cloudflare (1.1.1.1)"
Step 7
It's done. Go back to your browser and try again.